Network Attached Storage (NAS) options are everywhere, and you can pay a pretty penny for a solution. Attached to a network switch or router, it is a device that can hold backup data for multiple devices.
You could buy a basic NAS option for just around $100 or a more advanced solution for over $1,000.
Don’t forget, however, that you also have to buy drives for that NAS. And you don’t want to just buy a standard drive; you need to purchase one created specifically for NAS devices.
It can get confusing and expensive.
That’s why I often turn to Linux when I need to deploy a NAS solution. If you dig deep enough, you’ll find that most NAS devices run on Linux anyway, so why not cut out the middleman and get right to the heart of the matter?
One of my favorite Linux NAS solutions is OpenMediaVault (OMV). You provide the server and the associated storage, and OpenMediaVault turns it into a NAS machine.
Although this Linux distribution does have a slight learning curve, you can have it up and running fairly quickly.
Even without opening that first support document, I was able to have a share up and running in fewer than 5 minutes.
Because I tested OpenMediaVault as a VirtualBox virtual machine (VM), I had to shut it down, create a new drive for it, reboot the OS and then connect the new device to the system. That took roughly half of the five minutes to get this solution up and running.
Even with that slight learning curve, OpenMediaVault is pretty easy to use.
Features of OpenMediaVault
OpenMediaVault includes features like:
Multilanguage, web-based GUI for easy administration.
SSH access.
Supports multiple protocols, including CIFS (via Samba), FTP, NFS (versions 3 and 4), SSH, rsync, iSCSI, AFP and TFTP.
Allows for RAID configurations (levels 0, 1, 4, 5, 6, 10, and JBOD).
Compatible with ext2, ext3, ext4, Btrfs, XFS, JFS, NTFS and FAT32.
Includes Syslog, Watchdog, S.M.A.R.T., and SNMP (read-only).
Provides email reports and graphical statistics for CPU workload, LAN transfer rates, hard disk usage and RAM allocation.
Allows for detailed user and group management with access controls via ACL.
Supports quota management for users.
Modular design that allows for easy installation of additional plugins to extend functionality.
Variety of third-party plugins through the OMV-Extras repository.
Installation of OpenMediaVault
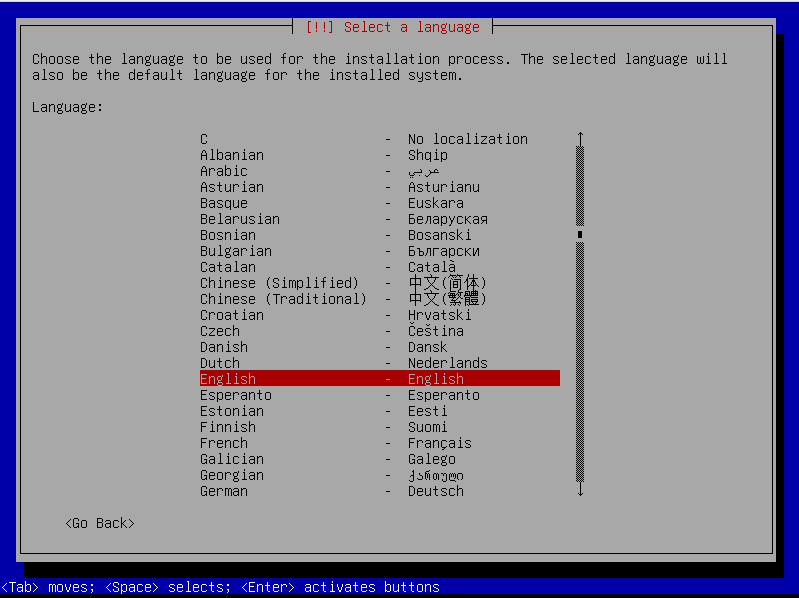
The installation of OpenMediaVault resembles an old-school Linux distribution, using a curses-based installer (Figure 1).
Figure 1: The OMV installer is much easier than you might think.
Using the OMV installer simply requires you to use your arrow keys and Tab key to make selections and then type an admin password. It’ll take you fewer than 5 minutes to have it up and running.
Usage
Using OpenMediaVault does take a bit of time to understand, as there are a few tricks you must know about.
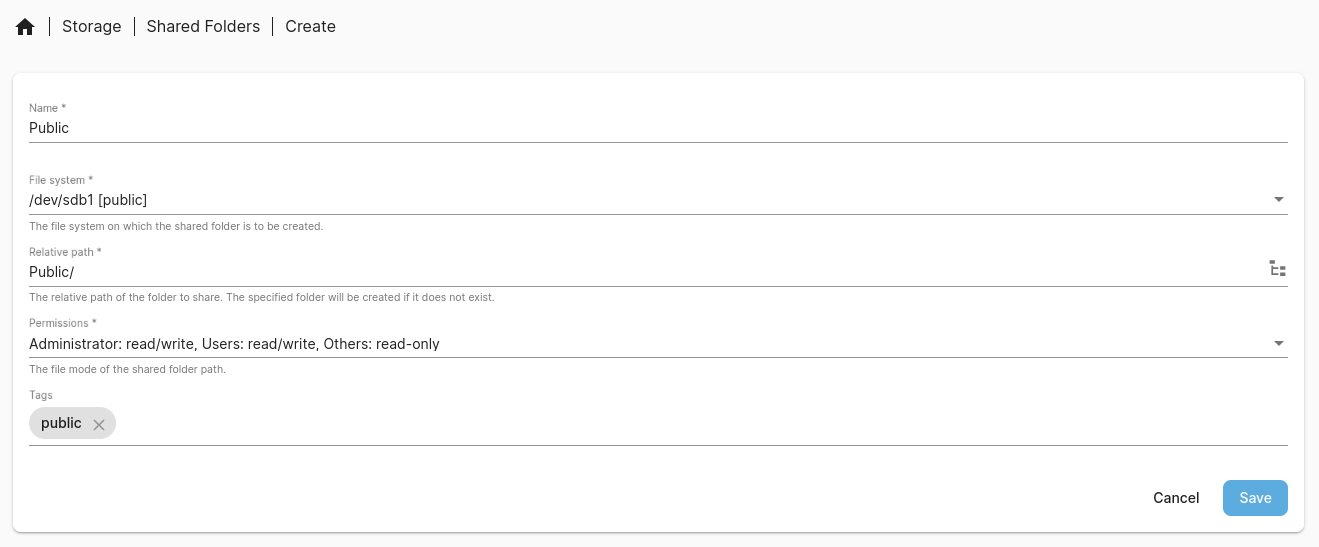
First off, creating a share requires the following steps (all from the user-friendly, web-based GUI):
Create a standard user (from Users > Users > +).
Enable home directories for users (Services > SMB/CIFS > Settings).
Add a disk (Storage > Disks) that can be used. This will require an external drive, as you cannot use the same disk that the OS is installed on.
Create a file system (Storage > File Systems > +).
Create a shared folder (Figure 2).
Figure 2: Adding a new shared folder in OMV.
If you’re going to use Samba (SMB) for sharing folders, there’s one other thing you have to do that must be taken care of from the command line: enabling a user for Samba. This has been a sore point for me, because it’s rarely mentioned in documentation and most often doesn’t have a GUI option. Because of this, a lot of users find themselves frustrated because they aren’t aware that this step has to be taken care of.
Here’s what has to be done.
Log in to OMV via SSH (via the admin or your standard user account).
Make sure your standard user has sudo privileges with sudo useradd -aG sudo USERNAME (where USERNAME is the name of the standard user).
Log out and log back in.
Add your standard user to Samba with the command sudo smbpasswd -a USERNAME (where USERNAME is the name of the standard user). You’ll be prompted to create a new Samba password (note that the original password is blank).
Enable the user so they can access Samba shares with sudo smbpasswd -e USERNAME (where USERNAME is the name of the standard user).
Log out.
If everything has gone to plan, you should be able to access the shared folder via the standard user you just enabled for Samba.
I’ve overly simplified the usage of OpenMediaVault, but it really isn’t much harder than what I’ve outlined above, which is why I love this Linux distribution for my NAS needs. I’d much rather deploy OpenMediaVault than use a NAS-specific device, because I feel I get more control over my network storage when using this solution.
Updating OpenMediaVault
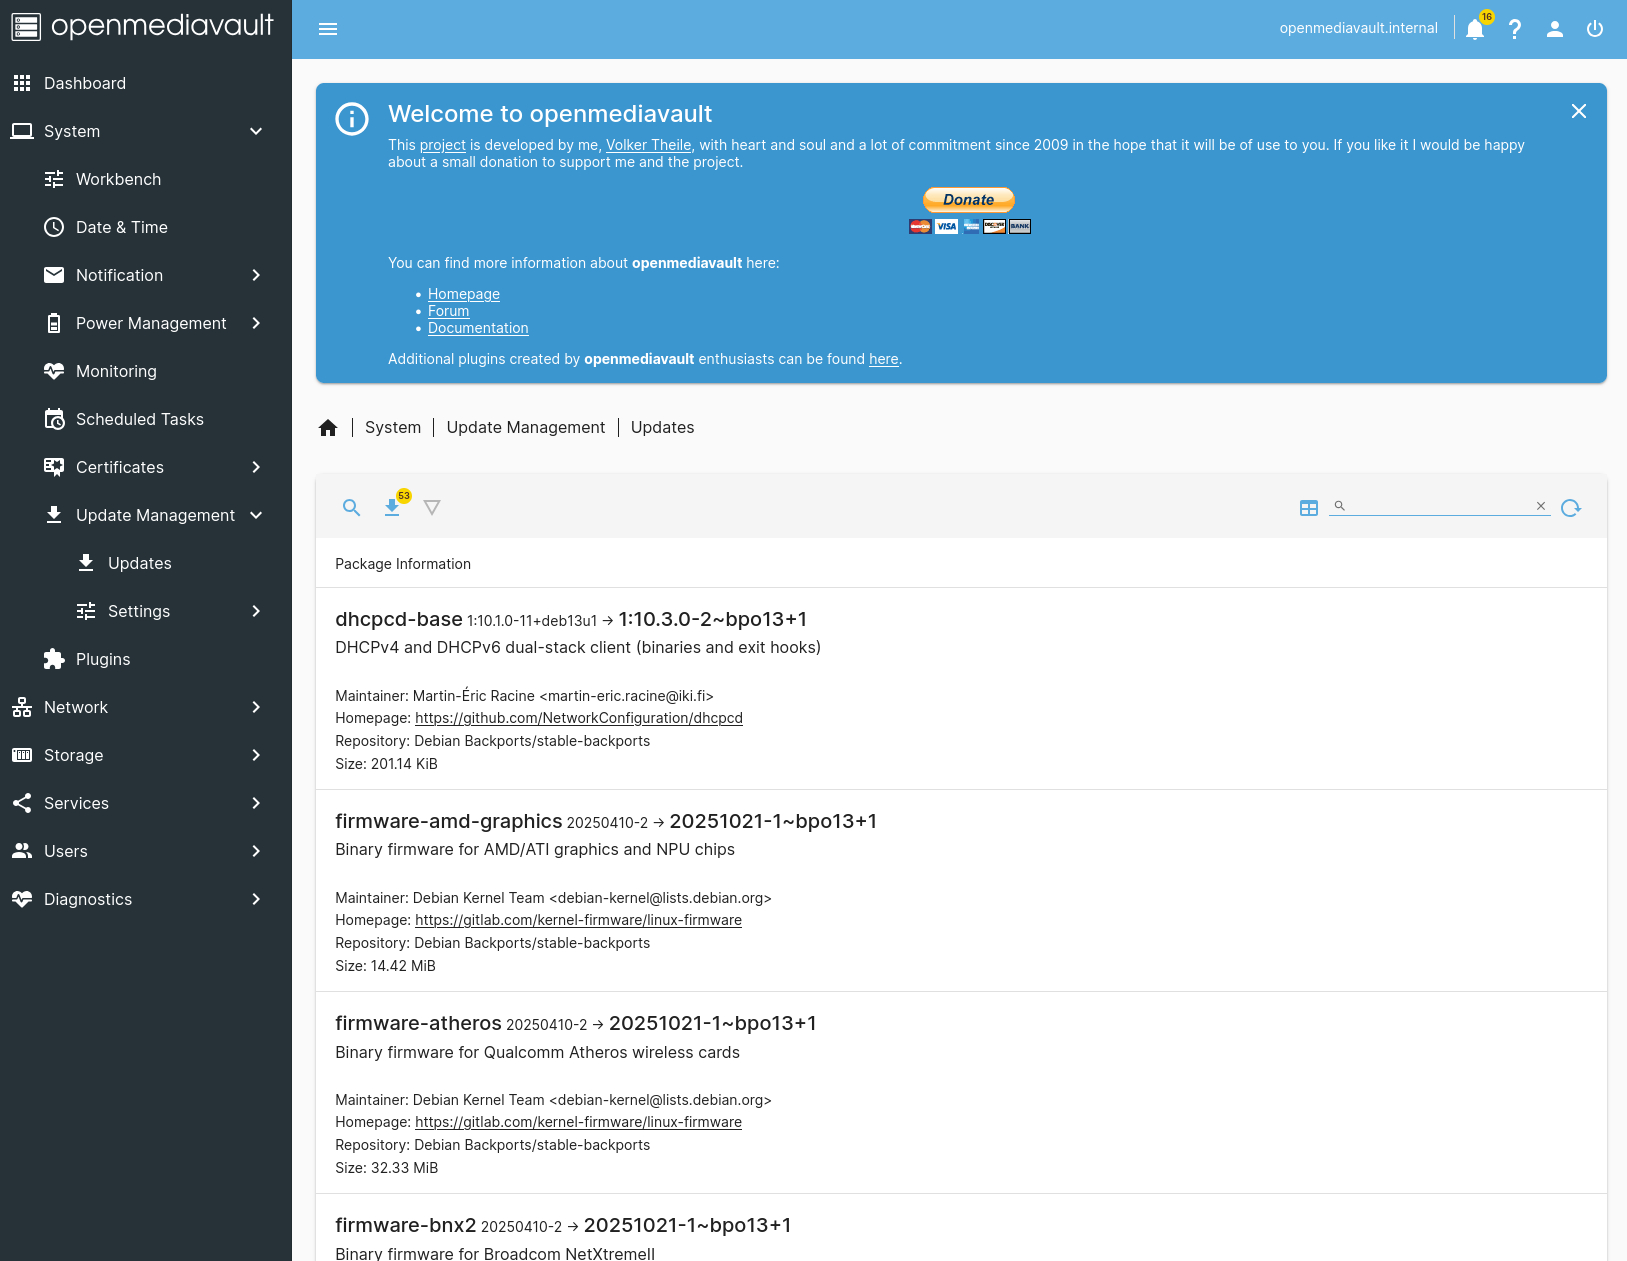
Finally, I thought I’d mention how OpenMediaVault is updated. You don’t have to use the command line for this. Instead, log in to OMV with the admin account and go to System > Update Manager > Updates.
From the Updates page (Figure 3), you’ll see any available updates listed. Click the downward-pointing arrow to run the updates.
Figure 3: My OMV installation has 53 updates available.
And that’s all there is to OpenMediaVault. This flexible, powerful solution is an outstanding option for both home and small business network storage. OMV is easy to deploy and manage, and won’t cost you a penny (other than the hardware that will house the system).
YOUTUBE.COM/THENEWSTACK
Tech moves fast, don’t miss an episode. Subscribe to our YouTube
channel to stream all our podcasts, interviews, demos, and more.